Airflow Deployment on Local Kubernetes Cluster
Apache Airflow has emerged a the de-facto way to configure, orchestrate and deploy workflows. When combined with Kubernetes, Airflow can provide a highly-scalable, modular framework for the deployment of Data Science pipelines. This post will review steps to deploy Airflow into our local development Kubernetes cluster.
Apache Airflow
Given its popularity there are a ton of posts that provide background information on Airflow. Core components of Airflow include:
- Operators - the implementation of a wrapper to execute a single task. Examples of Airflow Operators would include BashOperator, PythonOperator & KubenetesPodOperator.
- Tasks - a single idempotent unit of work that is executed within an Airflow workflow (aka DAG).
- DAGs (Directed acyclic graph) - a combination of Tasks (i.e. Operators) that have been connected in an ordered approach.
- Scheduler - an Airflow process that is responsible for running DAGs at the time they are scheduled (similar to Cron).
- Workers - spawned resources that host/execute Tasks within Airflow (most relevant in the context of a cluster environment).
- WebUI - UI used to configure and view DAG status.
- Executor - responsible for executing the individual Operators configured in the DAG when prompted by the Sceduler. Common Executors include SequentialExecutor, CeleryExecutor & KubernetesExecutor. For more information about Executors read this article.

In a production Kubernetes environment we would most likely use KubernetesExecutor. However given this is just a single Node local cluster we will deploy Airflow using the CeleryExecutor. This will provide support for parallel Task execution via the Celery workers and will still allow us to use the KubernetesPodOperator to execute Containers within a DAG if desired. Executor management is mostly transparent to the user so DAGs that run on our local development environment will require not modification when deployed to production KubernetesExecutor environment (Tasks will just be deployed to Kubernetes Pods instead of Celery workers). The only watch-out is that deployment with CeleryExecutor will create a larger infrastructure footprint (redis, flower monitoring service, & workers) which could result in additional resource usage on your local machine.
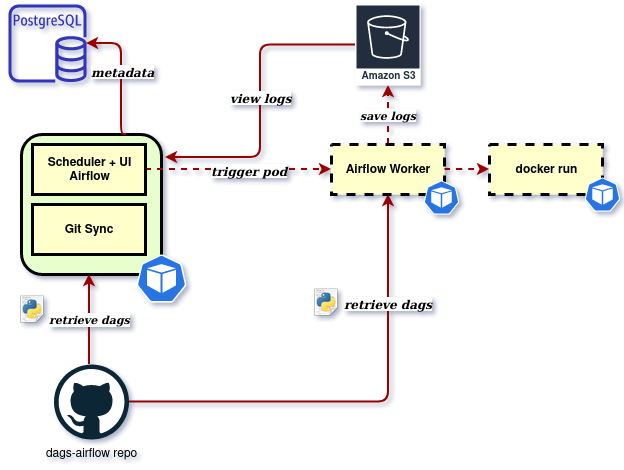
Within the Airflow system DAGs are kept in mulitple locations including on the Scheduler, Web and Worker nodes. In order to have synchronized files there are two main strategies used:
- Shared file-system - a shared file-system asset that can be accessed via the different Nodes.
- Git-sync - a “side-car” container that runs in parallel with each Node to synchronize all DAGs locally via a git repository.
In order to drive a Git-Ops mentality, this post will configure our Airflow deployment to use the second, git-sync strategy.
Create namespace
As with all Kubernetes deployments and installations it is advisable to create a logical namespace:kubectl create namespace airflow
Installing Airflow via Helm
We can install Airflow using Helm, the Kubernetes package manager. The Stable/Airflow repository is the official package for installation and can be installed via helm install airflow stable/airflow. Before installation however it is possible to inspect the YAML files that will be used for installation with helm pull stable/airflow -d . --untar. This will download the deployment files from the stable/airflow repository and extract them to local directory. In particular it is recommended to understand all of the configuration variables that can be specified during installation by:
- Reviewing configuration documentation at stable/airflow repository README
- Review the default values.yaml file
The values.yaml file is used to specify configuration variables for helm and can be referenced via helm install airflow stable/airflow -n airflow --values values.yaml. This command:
- Installs the stable/airflow deployment package
- Names the deployment as airflow within helm tracking
- Installs into the airflow namespace (-n option)
- Provides configuration variables in values.yaml (–values option)
If you want to see what generated deployment files will be without installing them you can use the template option with helm. The example below shows how to generate deployment files into current (.) directory and specifies a few configuration variables on the command line vs. using values.yaml:helm template --set airflow.executor=KubernetesExecutor --set workers.enabled=false --set flower.enabled=false --set redis.enabled=false stable/airflow --namespace airflow --output-dir .
For this installation we will mostly use the defaults and only modify a few configuration parameters - specifying that we will use git-sync, associated repository details, and providing a service account name to use. Additionally I set the postgres database to not enable persistence - meaning it will not create a persistent volume for data storage. I have done this so that if I delete and re-deploy no history is kept from previous running instances.
dags:
    path: /opt/airflow/dags
    persistance:
        enabled: false

    git:
        url: "https://github.com/ckevinhill/airflow-kubernetes-example-dags.git"
        ref: "master"
        gitSync:
            enabled: true
            refreshTime: 60
        mountPath: "/opt/airflow/dags"

serviceAccount:
    create: true
    name: airflow-sa

postgresql:
    persistence:
        enabled: false
This values.yaml file can be found in local-executor-values.yaml. This can be renamed to values.yaml for use in example commands below.
With values.yaml file created we can execute Airflow installation via:helm install airflow stable/airflow --namespace airflow --values .\values.yaml
Congratulations. You have just deployed Apache Airflow!
KubernetesPodOperator
The KubernetesPodOperator is a specific Operator that allows DAGs to create Kubernetes Pods that run specific containers. The idea is that you can containerize specific functionality, push container to image repository and then launch the container into the Kubernetes cluster. To enable the KubernetesPodOperator to have permission to create new Pods within the cluster we need to give our service account airflow-sa cluster permissions.
kubectl apply -f https://raw.githubusercontent.com/ckevinhill/airflow-kubernetes-example/master/create-service-account-role-bindings.yaml
In this case I’m setting the service account as a member of the cluster-admin role which is probably not advisable if this was a production deployment.
Deployment verification
kubectl get pods -o wide -n airflow should show a list of running pods:
Some of the Pods (e.g. web and scheduler may experience a few crashes at start-up as they wait for the postgres DB to initialize )
You should now be able to view the Airflow UI by first enabling port-forwarding to the pod container:kubectl port-forward airflow-web-78b87bd94c-856kz -n airflow 8080:8080

You can also open a terminal shell to scheduler or work nodes which can be helpful to access logs or confirm system settings and pod environmental variables or other diagnostics:kubectl exec -it airflow-scheduler-6df66b4fb8-p94tb -c airflow-scheduler -n airflow -- /bin/bash
Since each pod is running a git-sync side car container you have to specify the container you want to terminal into using the -c option. If you are not sure what container names are within a pod you can use the ‘kubectl describe pod -n ` to view details including container names.
There are two test DAGs in the https://github.com/ckevinhill/airflow-kubernetes-example-dags repository to confirm that local and Kubernetes operators are working correctly.

Testing PythonOperator DAG
We can test the DAG using the airflow test capabilty:kubectl exec -it airflow-worker-0 -c airflow-worker -n airflow -- /bin/bash$ airflow test test_python_operator hello_task 2020-05-01

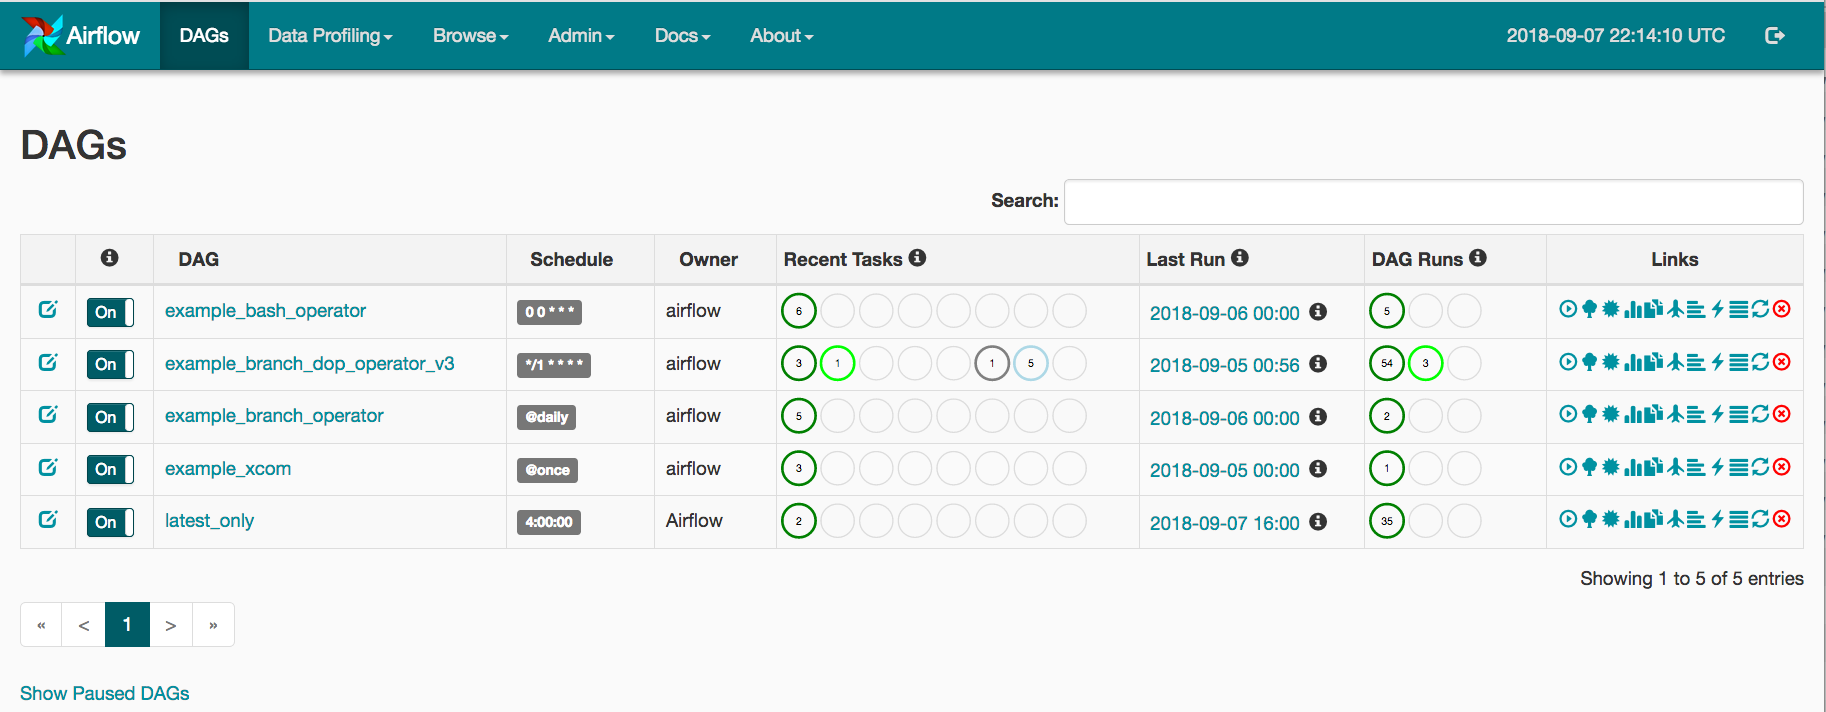
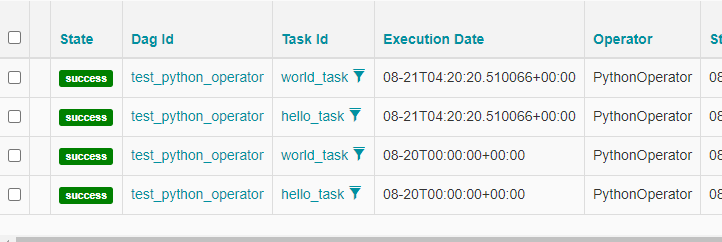
Once we have executed the tests we can then manually Trigger the DAG in the Airflow Web UI. To trigger the DAG turn the DAG “on” in the UI and then click the “Trigger DAG” button. After a few moments you should see that the Tasks have completed successfully.

Testing KubernetesPodOperator DAG
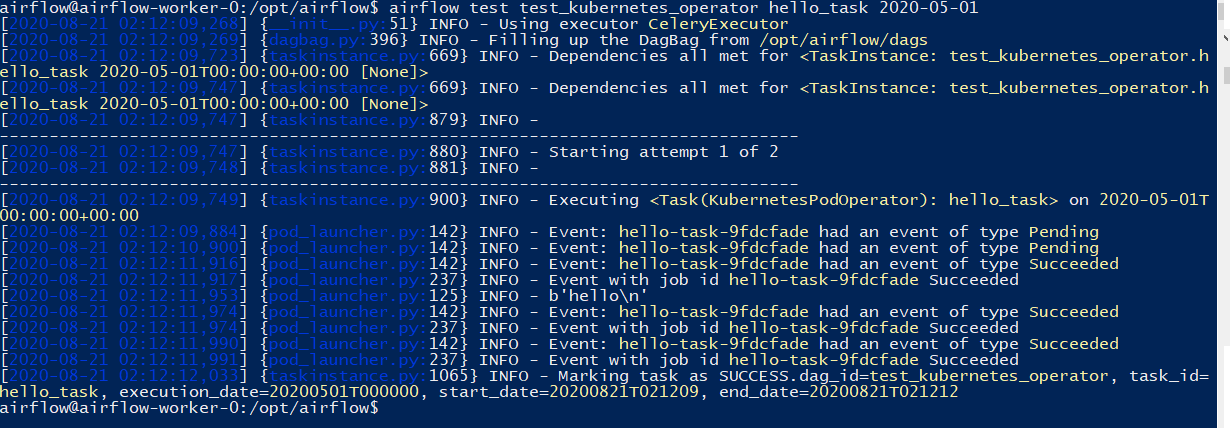
DAG confirmationa and validation can be done using the airflow test capabiltiy. Optionally before executing the test, open a new Powershell session so we can watch changes to pods in the airflow namespace to see if new pods are created when we run the KubernetesPodOperator with kubectl get pods -n airflow --watch.
Similar to above PythonOperator DAG test, run a test of the test_kubernetes_operator workflow:

You should also see Pods created and executed in the –watch window:
The KubernetesPodOperator parameter
is_delete_operator_pod=Truecan be set to determine if Pods should be deleted or maintained after successful execution. In some cases you may want to not delete the containers after execution to preserve logs and final execution state. If you setis_delete_operator_pod=Falseyou can later delete all successfully completed Pods withkubectl delete pods -n airflow --field-selector=status.phase==Succeeded.
Removing Airflow deployment
Uninstalling the Airflow deployment can be done via:helm uninstall airflow -n airflow
You can then delete the airflow namespace:kubectl delete namespace airflow
Above commands do not delete the cluster role binding as I will leave this role binding for future instances where I launch future Airflow deployments.
Wrap-Up
This completes the setup for launching an Airflow deployment with both distributed and Kubernetes based task execution. For future projects I can clone the example repositories and change the git repository parameters to point to my DAG project files. I should then be able to quickly launch developement deployments as needed.
